
The first movie I saw that really got me excited about computers was WarGames. The WOPR was an inanimate object that just sat there on screen. But, it was still a complete character all by itself. It reacted to the Matthew Broderick character’s commands and questions and became something more clever than just a boring piece of hardware. The fictional software running inside the WOPR and Broderick’s character’s ability to interface with it created a story that was incredibly mystical and exciting. It made computers seem exclusive. Only a few skilled people could understand them. People who had these skills were members of an exclusive club. They knew how things worked, and how to do the coolest tricks.
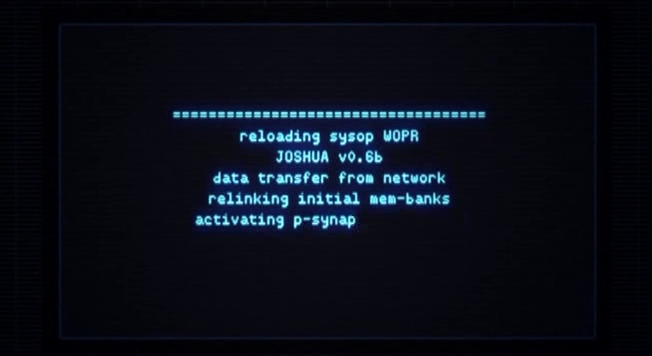
WarGames
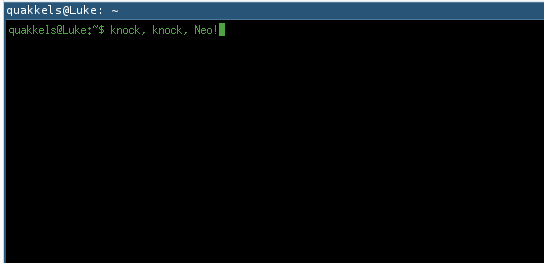
Green and blue text on black screens became a symbol of those skills. Hackers didn’t need pictures or windowed interfaces. They were the best, and therefore didn’t need any extra ornamentation. The coolest interfaces were both simple and complex. Simple because it was text, and complex because of the heavy tasks these techno elites were accomplishing. Something as simple as “knock, knock, Neo.” blew my mind the first time I saw it, not because of flashy graphics. Rather, it was because I was immersed in that fictional universe. I believed that a hacker, at a keyboard somewhere in another dimension, that was talking directly to Mr. Anderson with the text on that black screen.
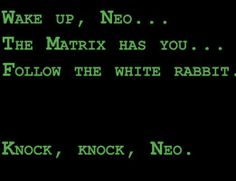
The Matrix
Around this same time I learned about real people that changed the world with their computer ninja skills. Language designers, operating system inventors, and application developers who changed how we live every day. These titans of technology all knew how to build things using a black screen and green text. So let’s follow suite, hey? Let’s swallow the red pill, drink the Cool-Aid, and nerd up!
Enter Linux
I’ve been led to believe there is a great big computing world out there with green text in the form of Linux. The amount of time I’ve already spent on tangents about awesome movies means that I won’t go into the history of Linux here. If you don’t know what Linux is, you should watch Revolution OS. It’s free. Do it now.
Debian Linux on a virtual machine
I knew that installing Linux would involve climbing a learning curve. This can often lead to a little frustration. My frustration started early, but interestingly it was due to proprietary technology. Not due to Linux. I work in Windows 8.1 Pro for nearly all of my day to day development work. Windows 8.1 Pro includes Microsoft’s virtualization software called Hyper-V. From what I understand, Hyper-V can be very good. But it gave me a significant headache. My efforts to install Linux were derailed when I had trouble getting my Hyper-V VM to connect to my network. This was beyond frustrating. I eventually experienced the giant annoyance of breaking my host machine’s WiFi configuration. The only way my laptop could connect to the Internet was through a wired connection. I was beyond perturbed at this point, so once I restored my laptop’s networking settings I abandoned the idea of using Hyper-V in favor of virtualization software that I am much more familiar with: VirtualBox. VirtualBox is probably a better choice for this anyway because it runs on more operating systems than Hyper-V, and it doesn’t cost anything.
Note: If you have turned on Hyper-V on your Windows machine and have since decided to use different virtualization software, turn it off in the “Turn Windows Features On/Off” section of the Control Panel. If you leave it on it will compete with your new virtualization software causing unusual behavior — such as being almost completely borked.
Once VirtualBox was installed, then I needed to choose a distribution of Linux to install. After asking around on IRC, I decided to use Debian Testing for this endeavor. Debian has three main releases. Stable, Testing, and Development. Stable is usually very, very stable. But, to be so stable, it sacrifices current software in favor of older software that has been tested for a longer period of time, as in years longer. The development release is (shockingly) the version of Debian that is in development, thus it is the least stable version and prone to breaking. The Testing release is the “just right” flavor of Debian that strikes a balance between age and stability. Or so I’ve been told.
I had a hard time finding the download link for Debian Testing. With help from IRC, I eventually came across a page explaining that the Testing release of Debian (at this time) is code-named Stretch. I decided that the most likely link to download the release I’m looking for was on this page. I chose a CD ISO image for netinst (perhaps standing for ‘Network Installer’) and the only reason I felt somewhat sure that I was downloading the right ISO is because “stretch” was in the file name. Seems this whole section of the Debian web site could be easily improved to be more user friendly. Maybe a site that is hard to use is just a hazing ritual people have to go through in order to join the ranks of the “green text elite” programmers. If so, okay. I’m willing to jump through a couple of hoops. Remember WarGames? That shit’s awesome.
Note: The Debian devs seem to like Toy Story.
After the ISO finished downloading, I created a new virtual machine in VirtualBox. It got 4GB of memory and 30GB for its hard drive. I called it Luke. The next VM I spin up will probably be called Leia. I like Star Wars. Part of being a programmer is naming your stuff whatever the hell you want. Yus!
Since the ISO I have is the network installer version, the networking configuration has to work, or it will not be able to get the rest of the packages it needs to finish installation. Luke was configured for Bridged networking. It should work, I won’t really know until I load the ISO as a fake CD into Luke’s fake CD drive and try to install Debian from the network. Use the network, Luke.
Installing Debian was pretty easy. Being in the United States, just about all the default settings were what I wanted. Really I just had to tell the installation process which timezone I wanted and to use the entire virtual hard drive for Linux. I did decide to not install any desktop or GUI. The typical desktop experience is not the goal here. Let’s start with just the essentials. A command terminal is essential. I think it’s important to use a terminal so I can feel comfortable working in most other Linux configurations. And, I should be able to SSH into a networked Linux machine to perform maintenance, programming, configuration adjustments, and any other task a programmer may want to perform.
It’s installed. Now what?
After it finished booting up, Debian presented a nice login screen. Really simple and uncluttered. It was nice. The green text that I like so much wasn’t there, but it had a black background. At this point I’m thinking I can probably figure out how to configure green to be the default text color. But for now, I can’t help but feel pleased with myself.
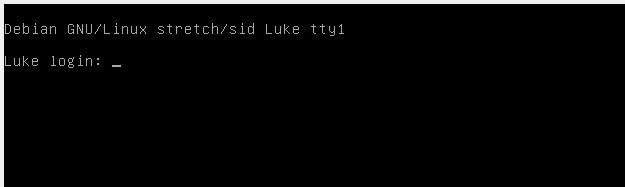
So I entered my username and my password and was greeted by a really nice, simple command prompt.
Where is sudo?
Apparently, some pretty standard items were missing from my current Debian setup. The obvious thing that is missing is any kind of desktop environment. I skipped that on purpose, so not a problem there. However, the plan was to install a very minimal window manager called i3wm that looked like it would be fun to use instead of a desktop environment that was just imitating Windows and OSX. i3 promised that it was really configurable, and the screenshots on their site had green and blue text on a black background. In short, it looked like an environment I would enjoy working in. But as I started trying to install the software I ran into problems.
One of the most basic operations to perform in Linux is installing software using a package manager. Windows doesn’t have a culture around package managers, so this might seem odd to you if you are coming from a Windows only world. But, in Linux world, package managers are one of the best ways to install new programs.
The package manager that Debian uses is called apt-get. This allows you to install software with a command that gets entered into the terminal. So if I wanted to install a program to be my window manager (like i3wm) I could install it like this:
$ apt-get install i3
The thing is, that command only works of the user who is entering the command had permission to install software. A user like root would need to do that. The root user in Linux is like the equivalent of an Administrator account in Windows. Root has permission to install programs. However, there is a pretty big rule that you don’t usually want to log into Linux as root. It’s just safer to not be root when you use Linux. So the typical way to install software with apt-get changes to use another program called sudo. The modified command looks like this:
$ sudo apt-get install i3
The sudo command will temporarily changes your regular user’s permissions to root level so that the next command (apt-get) will be executed with elevated permissions. At least, that’s how it is supposed to be. But for me, it didn’t work!
Not sure why, but for some reason my Debian instance did not have sudo installed. Maybe it was somehow related to me not installing a desktop environment. I don’t know for sure. But it struck me as odd. It seems that the reason sudo wasn’t installed is because I set a root password during installation. So I used a series of commands to install sudo so I could use it for all software installs going forward. Here are the commands I ran:
$ su root
$ apt-get install sudo
$ sudo adduser quakkels sudo
$ su quakkels
The su command (pronounced like soo) is the command to switch the current user to the user that is specified. Once I switched to root I was able to install sudo and add my regular user to the list of sudo-ers. Once that was completed, I switched back to my regular user account. Now I was able to install i3wm.
$ sudo apt-get install i3
I think it worked. Excellent!!! I sat there, looking at my screen. It didn’t change. I tried a reboot thinking that it would start up with i3wm working.
$ sudo reboot
The same login screen came up as before. I logged in and then thought that maybe I need to run i3 in order to start the window manager.
$ i3
Now that definitely did not work.
$ sudo i3
That also definitely did not work. But, thanks to some advice from IRC and this guy, I knew enough that i3 has a dependency on xorg. So let’s install that.
$ sudo apt-get install xorg
This was all well and good. But, I still had no idea why i3 wasn’t managing my windows yet! Starting to get a little annoyed. I should be patient though. It’s all about the learning experience right now. So after some googling, I found this on the i3 FAQ. That FAQ question described almost exactly what I was experiencing.
From the FAQ:
The easiest way to get started is to edit (or create, if misisng) ~/.xinitrc. If it didn’t exist, simply put exec i3 in there. If it exists, check the bottom for some exec call, comment it out and put exec i3 instead. Once the file is saved, run startx from the TTY. This will start an X server, read the file and then start i3.
Also, note that the character ~ represents the current user’s home directory.
After following the advice in that FAQ answer, I was able to start the i3 window manager with the following command.
$ startx
After I entered that command and pressed ‘enter’ celebration ensued. Now I had a working i3 environment. A little google/bing/duckduckgo’ing revealed that I could open a new terminal using the keyboard shortcut alt+enter. If a user needs to launch a program that doesn’t run in a terminal, it can be started using a special prompt launched with the shortcut alt+d. Then the name of the program you want to type can be entered and launched. I quickly isntalled a few must have programs: an IRC client called irssi, and a web browser called Ice Weasel.
$ sudo apt-get install irssi
$ sudo apt-get install iceweasel

But, but — I thought there would be a black background?
Things are going pretty well, so far. But I’m not going to hide that I felt a pang of disappointment when I opened a terminal in i3 and it had black text on a white background. That is unfortunate. When I use this VM I want to feel like I’m in the movies. I know that’s a totally shallow goal, but it’s still fun. And I’m a little stubborn. So I will have to figure this out sometime, but for now it is working.
A little VM housekeeping
VirtualBox provides something called Guest Additions that can be installed in operating systems running in their VMs. Guest Additions are nice because it lets the guest machine interact with the host in a much more streamlined way. I installed it primarily because I wanted the Linux workspace to resize when I resized the VirtualBox window. There are a couple of websites out there that have decent instructions. The instructions I followed are here. Configuring the VM and inserting the Guest Additions cd wasn’t an issue. But Linux has this concept of ‘mounting’ a drive before you can use it. Maybe Windows and other OS’s have this concept too, but it may have been behind the scenes. I struggled with the mounting concept because it wasn’t in the step by step instructions that I followed. After pounding my head against the wall for way too long, I kind of stumbled on the ‘mount’ command. The commands I used in Linux to install Guest Additions were these (executed in a root terminal):
$ apt-get install module-assistant
$ m-a prepare
$ mount /media/cdrom
$ sh /media/cdrom/VBoxLinuxAdditions.run
After a quick reboot, the desktop environment was working with Guest Additions nicely.
Chasing that black background
It was still important to me that the terminal in i3 had light text on a black (or dark) background. A simple command told me what terminal i3 used.
$ echo $TERM
That printed out ‘xterm’. According to online search results, xterm is one of the older terminals that exist. And, it is configurable. So I got busy configuring it according to my own tastes.
At that point, I started getting frustrated. My Linux VM had no ~/.Xresources file, so I went ahead and created one. That wasn’t a problem. The first problem was when I tried to copy and paste from my web browser into the Nano text editor that I was using to edit the new .Xresources file. Ctrl+c and Ctrl+v weren’t working for me. To avoid that issue in the short term, I decided to just manually edit two configuration settings: the foreground and background colors. My patience was starting to wear thin.
xterm*foreground: rgb:4f/a3/43
xterm*background: rgb:00/00/00
I added those configuration settings to the file, closed the terminal, and opened a new terminal. Nothing changed. At this point I really was expecting the configuration file to take effect and overwrite the default settings. But it didn’t. I sat at my desk thinking about how it should have worked. It should have worked. Every other time I changed a config file it took effect as soon as the program restarted. Sure, cache might need to be cleared too. But this is how I understood computers to work. Adding or changing configuration should result in the program’s behavior changing to match. But it didn’t happen.
Reading further down the instructions led me to a command that seemed to somehow ‘merge’ the .Xresources file with the actual configuration. This seemed odd to me. But, okay. That’s just how this works I suppose. So I ran the command.
$ xrdb -merge ~/.Xresources
Now we’re getting somewhere! I closed the terminal and reopened it. Success! I wrote a few words and then sat back in satisfaction. I ended the day feeling great about my new Linux environment.
The next day, losing my cool
What is this crap? This is some kind of messed up shit.
The terminal colors were wrong. I changed them the day before, but the original colors were back. I checked my .Xresources config file and it hadn’t changed from the way I left it the previous day. It still had the color settings. This ticked me off. Configuration settings shouldn’t just reset themselves like this. Apparently they do in in this case though. Bad. I was beyond annoyed.
Thanks to some help from this post, I figured out that there is yet another step to configuring applications with .Xresources. So I added the line to my .xinitrc file and rebooted.
xrdb -merge .Xresources
That did not work. Then I changed it again, and rebooted.
xrdb -merge ~/.Xresources
This did not work. What the Hell, man? Let me guess. I probably need to not only configure the .Xresources configuration file with .xinitrc. I probably need to configure the .xinitrc configuration file inside some other configuration file. It’s configuration-ception!
The actual fix was not that rage inducing as configuration-ception. Instead, there is a rational reason it isn’t working. Apparently, the .xinitrc is not a configuration file in the way that a typical XML or JSON file is a configuration file. The ‘rc’ stands for run commands. The order of each line matters. I put the merge command at the end of the .xinitrc file. This means that the i3 window manager was starting before the .Xresources configuration file was merged in. So I updated the .xinitrc file.
xrdb -merge ~/.Xresources
exec i3
It seems so simple now. I should have realized this earlier. For crying out loud, the only two lines in this file are both commands. Well, that’s hindsight for you.
Please share this post with a friend, and subscribe to get notified of new posts.
Comments may be sent to blog@quakkels.com.