Xamarin enables programmers to write native mobile applications for both Android and iOS using C# and free development tools like Visual Studio Community Edition. This means that if you’re invested in the .NET ecosystem and the C# language, you can write cross-platform mobile applications using technology that’s already familiar to you.
A note on development for iOS: You will need a mac in order to build iOS versions of the app. I don’t have a Mac available, so I’ll be getting started with a cross-platform project, but I’ll just be using Windows and testing the Android version.
Visit https://visualstudio.microsoft.com/ to download Visual Studio Community (the free version) and install it. Be sure to select Mobile Development Tools during installation so Xamarin projects will be available.
Intended Audience
This is written for C# programmers who want to start working with mobile apps. If you’re not somewhat familiar with using Visual Studio, C#, or XML then this may be challenging to follow.
MVVM
Before we create the first project, a quick word on practices. There are many ways of organizing an app, and one of the best practices is to use the MVVM pattern. MVVM stands for Model, View, View Model.
- Model (Data)
- View (Presentation)
- View Model (Business Rules)
By keeping our data in the Model, our presentation code in the View, and our business logic in the View Model we’re keeping concerns separate. This will make the project simpler to understand and maintain as it grows.
It’s funny how different ecosystems have different names for very similar concepts. Django has Model/View/Template. ASP.NET MVC has Model/View/Controller. XAML has MVVM. The consistent core idea is to separate concerns to make things simple to understand.
Create a New Project
In Visual Studio select File > New > Project from the menu.
In the New Project Dialog select the category Installed > Visual C# > Cross-Platform from the list on the left. Then choose the Mobile App (Xamarin.Forms) project type and name it. I named mine “Lavender”.

Then in the next dialog, select Blank.

Notice that “Code Sharing Strategy” is .NET Standard. This is very interesting if you’re familiar with the new .NET Standard approach that Microsoft is implementing for the .NET ecosystem. .NET Core and ASP.NET are both proceeding using the same .NET Standard libraries supporting them. Having this option for Xamarin projects means that .NET programmers will have access to the same libraries for mobile that they’re used to using in their other projects.
Now we have a solution called Lavender and three projects in that solution. The main Lavender project, and a project each for Android and iOS.
Create folders inside the Lavender project to support the MVVM pattern. Create Models, Views, and ViewModels folders. To do this, right click on the Lavender project (not the Lavender solution,) and go to Add > New Folder.

When Visual Studio created the Lavender project, it automatically created a view for us called MainPage.xaml, and it has MainPage.xaml.cs behind it. Move those two files into the Views folder by dragging and dropping MainPage.xaml.

Open MainPage.xaml and give it this code:
<?xml version="1.0" encoding="utf-8" ?>
<ContentPage xmlns="http://xamarin.com/schemas/2014/forms"
             xmlns:x="http://schemas.microsoft.com/winfx/2009/xaml"
             xmlns:local="clr-namespace:Lavender"
             x:Class="Lavender.MainPage">
  <ContentPage.Content>
    <StackLayout>
      <Label Text="Hello World!" FontSize="Large" />
    </StackLayout>
  </ContentPage.Content>
</ContentPage>
A XAML <ContentPage> can only have one object in it. But, the reason we are using the <ContentPage.Content> object is because it can contain multiple objects. The <StackLayout> will literally stack objects either vertically (by default) or horizontally. The <Label> object is easiest way to get text to display on screen.
Save the file, then launch the debugger. The first time launching in the emulator may take some time… maybe several minutes… but eventually you will see it running.
Since this is running on Windows without a Mac, the project that runs needs to be the Lavender.Android project. Also, when you run this, you’ll want to make sure you have the Android SDK installed for the version(s) of Android you’re targeting. To manage your SDK tools, you can find a button for “Open Android SDK Manager” in the toolbar.

You will see this once the project finishes building, the emulator starts, and the app installs in the emulator:

Add Data Binding Between the View and the View Model
Add a label control that will bind to the Name attribute of a view model. Update MainPage.xaml to have this code:
<?xml version="1.0" encoding="utf-8" ?>
<ContentPage xmlns="http://xamarin.com/schemas/2014/forms"
             xmlns:x="http://schemas.microsoft.com/winfx/2009/xaml"
             xmlns:local="clr-namespace:Lavender"
             x:Class="Lavender.MainPage">
  <ContentPage.Content>
    <StackLayout>
      <Label Text="{Binding Name,StringFormat='Hello, \{0\}!'}" FontSize="Large" />
    </StackLayout>
  </ContentPage.Content>
</ContentPage>
It’s worth highlighting that these UI changes are being made in the shared library. This is reusable code that both Android and iOS will leverage. The Android and iOS specific projects are not being modified. Yet, the controls being displayed are the same native controls that you would get if you were building this app for Android using Java or for iOS using Objective-C or Swift. Not only is the code in a shared library, but the executable is not running in a VM like would be the case for portable JavaScript solutions.
Create a new class in the ViewModels folder. Call it MainPageViewModel.cs and put this code inside:
namespace Lavender.ViewModels
{
  public class MainPageViewModel
  {
    public string Name { get; set; }

    public MainPageViewModel()
    {
      Name = "Anonymous";
    }
  }
}
The Name property is what we’ll use for data binding. And, we’re setting the value to Anonymous for now.
Then, update the MainPage.xaml.cs code-behind file to use the MainPageViewModel class as its binding context.
using Lavender.ViewModels;
using Xamarin.Forms;

namespace Lavender
{
  public partial class MainPage : ContentPage
  {
    private readonly MainPageViewModel viewModel;

    public MainPage()
    {
      InitializeComponent();
      viewModel = new MainPageViewModel();
      BindingContext = viewModel;
    }
  }
}
Compile and debug the project with that change. You will see it in the emulator.
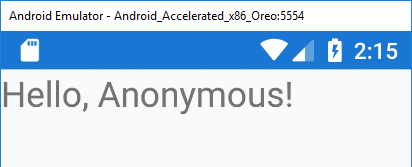
This shows that MainPageViewModel is being bound as the context in MainPage.xaml.cs and the value that was set on initialization is “Anonymous” and that is being passed to the MainPage.xaml view correctly.
Now let’s do something with the value entered by the user.
Add Form to Let the User Update Their Name
Update MainPage.xaml to add form controls allowing the user to enter and submit their actual name.
<?xml version="1.0" encoding="utf-8" ?>
<ContentPage xmlns="http://xamarin.com/schemas/2014/forms"
             xmlns:x="http://schemas.microsoft.com/winfx/2009/xaml"
             xmlns:local="clr-namespace:Lavender"
             x:Class="Lavender.MainPage">
  <ContentPage.Content>
    <StackLayout>
      <Label Text="{Binding Name,StringFormat='Hello, \{0\}!'}" FontSize="Large" />
      <Label Text="Name" />
      <Entry Text="{Binding NameEntry}" />
      <Button x:Name="Button" Text="Submit" Command="{Binding SubmitCommand}" />
    </StackLayout>
  </ContentPage.Content>
</ContentPage>
There are two elements that bind to properties that we haven’t created yet. <Entry Text="{Binding NameEntry}" /> and <Button x:Name="Button" Text="Submit" Command="{Binding SubmitCommand}" /> will require us to change the view model.
But, before we make changes to the view model, we need to create a new class that will facilitate notifying the view when the data in the view model changes.
Create a new file in the ViewModels folder and call it ViewModelBase.cs. Then put this code inside:
using System;
using System.Collections.Generic;
using System.ComponentModel;
using System.Runtime.CompilerServices;

namespace Lavender.ViewModels
{
  public abstract class ViewModelBase : INotifyPropertyChanged
  {

    public event PropertyChangedEventHandler PropertyChanged;
    protected void OnPropertyChanged([CallerMemberName] string propertyName = "")
    {
      var changed = PropertyChanged;
      if (changed == null)
        return;

      changed.Invoke(this, new PropertyChangedEventArgs(propertyName));
    }

    protected bool SetProperty<T>(ref T backingStore, T value,
      [CallerMemberName]string propertyName = "",
      Action onChanged = null)
    {
      if (EqualityComparer<T>.Default.Equals(backingStore, value))
      {
        return false;
      }

      backingStore = value;
      onChanged?.Invoke();
      OnPropertyChanged(propertyName);
      return true;
    }
  }
}
This abstract class gives us the SetProperty<T>() method which both changes the property’s value, and it notifies the UI so it knows to display the new value.
Now let’s update MainPageViewModel.cs to use this new abstract class. We’ll also add the new properties that the view needs for binding.
using System.Windows.Input;
using Xamarin.Forms;

namespace Lavender.ViewModels
{
  public class MainPageViewModel : ViewModelBase
  {
    public string NameEntry { get; set; }

    private string _name;
    public string Name
    {
      get { return _name; }
      set { SetProperty(ref _name, value); }
    }

    public ICommand SubmitCommand { get; }

    public MainPageViewModel()
    {
      Name = "Anonymous";
      SubmitCommand = new Command(() => { Name = NameEntry; });
    }
  }
}
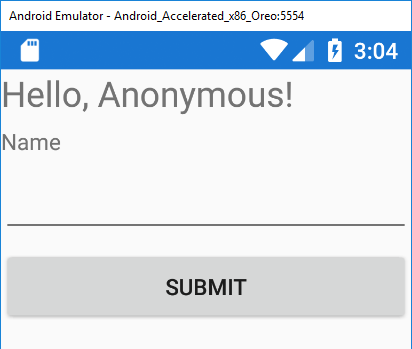
MainPageViewModel now inherits from ViewModelBase which give us the SetProperty() method. This class also has new properties now: NameEntry to support the name entry field, and SubmitCommand to support the submit button. The property Name has also been updated to use the SetProperty() method.
When we run the debugger, now we see this:
And submitting a name shows this:
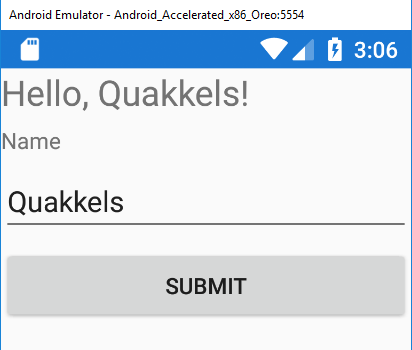
There you have it. These are the basic building blocks to get started building mobile applications using Xamarin.
Please share this post with a friend, and subscribe to get notified of new posts.
Comments may be sent to blog@quakkels.com.